Install and connect to a Raspberry Pi without monitor
The purpose of this post is to briefly show how to install the Raspberry Pi OS into a new microSD card using a laptop or desktop. Then boot the Raspberry Pi with this microSD card.
The Raspberry Pi will automatically connect to your wifi and the ssh tcp/22 service should be running, which will allow you to connect via ssh.
No need for a monitor to be connected to the Raspberry Pi.
Using the laptop or desktop, in the command line, the dd command will copy the Raspberry Pi OS into the microSD card.
After the dd command, 2 files need to be added to the /boot folder in the microSD card.
- One empty file named `ssh`

- One file named `wpa_supplicant.conf` with your wireless configuration
example for the wpa_supplicant.conf file
ctrl_interface=DIR=/var/run/wpa_supplicant GROUP=netdev
update_config=1
country=GB

network={
scan_ssid=1
ssid="MY_WIFI_NAME"
psk="MY_WIFI_PASSWORD"
}
Note
If you have multiple wlan interfaces, you can use one file per interface, for example wpa_supplicant-wlan1.conf
Step-by-step detail
Step 1 - Download
- Download the Raspberry Pi OS version of your choice.
Step 2 - Unzip
- Unzip the Raspberry Pi OS version you downloaded.
Step 3 - Copy
-
Copy the Raspberry Pi OS into the microSD card.
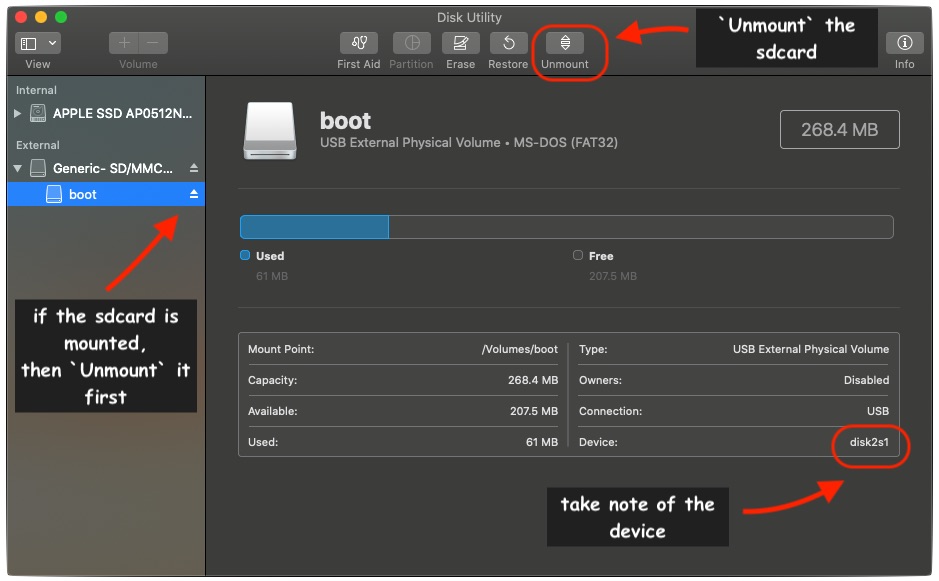
-
Make sure there are no mount folders.
IMPORTANT - the
ddcommand willdelete everything in the microSD card- make sure you know what you are doing! Otherwise, stop here or follow the official guidance here.
I am using the dd command.
sudo dd bs=1m if=path_of_your_image.img of=/dev/rdiskN; sync
- Example of my
ddcommand running
dd bs=1m if=2020-08-20-raspios-buster-armhf-lite.img of=/dev/rdisk2; sync
1760+0 records in
1760+0 records out
1845493760 bytes transferred in xxxxxxx secs (xxxxxxx bytes/sec)
Step 4 - add files into the boot folder
After the copy, the first partition in the microSD card is usually automatically mounted /boot.
Now, all I need to do is to copy the files that I already have on my laptop into this /boot folder.
I just have to drag-and-drop (or copy and paste) then into the /boot folder.
-
One empty file named
sshssh -
One file named
wpa_supplicant.confwith your wireless configuration
country=GB
ctrl_interface=DIR=/var/run/wpa_supplicant GROUP=netdev
update_config=1

network={
scan_ssid=1
ssid="MY_WIFI_NAME"
psk="MY_WIFI_PASSWORD"
}
if you cannot copy the files, why not use the command line?
cd /Volumes/boot

touch ssh

vim wpa_supplicant.conf << and add the content in here
Power on Raspberry PI Conclusion
And that's it :)
Now, eject the microSD card from your laptop, put it in the Raspberry Pi and on boot the Raspberry Pi, it should connect to your wifi.
To connect via ssh you need to find the ip address that was allocated to the Raspberry Pi.
Usually, you can easily find the ip address in your home router connected devices.
Alternativelly, if you have nmap installed your your laptop (or on another Raspberry Pi), you can scan your network for devices with tcp/ssh port 22 open.
example for the nmap command
{% highlight bash %}
searching for new device on local network
nmap -sT -p22 --open 192.168.1.0/24 # ( CHANGE FOR YOUR OWN SUBNET)
(...)
Nmap scan report for raspberrypi.home.local (192.168.1.238)
Host is up (0.042s latency).
(...)
Connect to raspberrypi.home.local
default username pi
default password rasbperry
Change pi default password
pi@raspberrypi:~ $ sudo passwd pi New password: Retype new password: passwd: password updated successfully
Update and configure for your needs
pi@raspberrypi:~ $ sudo raspi-config
{% endhighlight %}
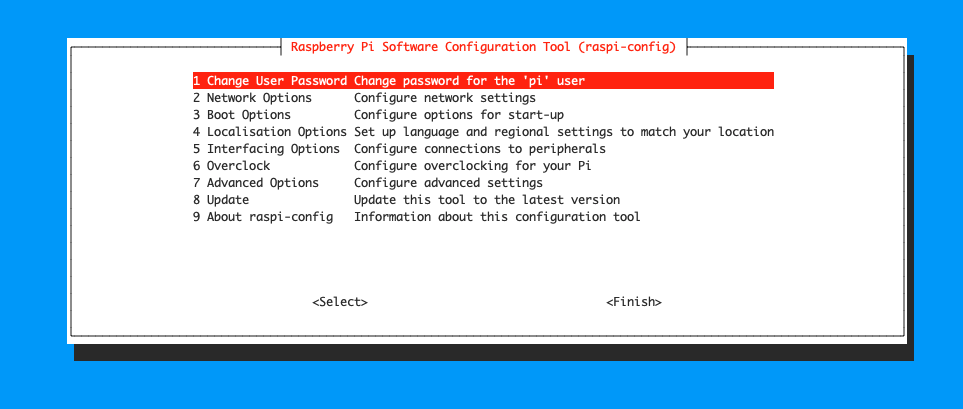
For example, change hostname, update config for your needs, check my other post on category raspberry-pi
- In case you need addition help, here is the link for the official documentation and here and here.
Happy learning,